How To Successfully Repair an Expansion Joint

Why Are Expansion Joints Necessary?
Expansion joints are installed to allow slabs to expand and contract. If you fill these joints with a hard material and restrict movement, the slab may crack, often resulting in “spidery” cracking patterns.
Another common issue is using a very soft filler (like a standard flexible silicone) that allows movement but then fails under heavy traffic – when a pallet truck or forklift passes, the soft joint compresses, transfers load to the slab edge and causes the concrete shoulder to break.
The most common joint issues include;
- The expansion joint was filled with a hard material and you’re seeing cracking in the joint or the slab.
- The joint edges have broken up or the existing filler has fallen out.
We will guide you through both scenarios so you can arrive at an effective, permanent solution.
Soft or Empty Joints - What to Do
If the concrete edges of the joint are still reasonably intact, your repair process can be simpler:
- Clean out the joint thoroughly — remove oil, grease and ensure it’s dry.
- If the joint is deep, fill it partially (e.g., with kiln‑dried sand) up to about 10–20 mm below the surface. Note: dust or sand on the shoulders might reduce the bond with the epoxy resin, so brush the shoulders clean.
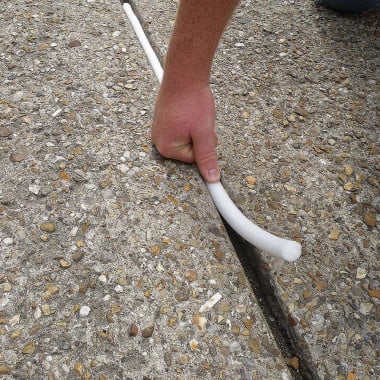
- Alternatively, insert a foam backing rod (available in various diameters) so that the filler sits ~10–20 mm below the surface, then apply the correct jointing product.
If the concrete edges of the joint are still reasonably intact, your repair process can be simpler:
- Clean out the joint thoroughly — remove oil, grease and ensure it’s dry.
- If the joint is deep, fill it partially (e.g., with kiln‑dried sand) up to about 10–20 mm below the surface. Note: dust or sand on the shoulders might reduce the bond with the epoxy resin, so brush the shoulders clean.
- Alternatively, insert a foam backing rod (available in various diameters) so that the filler sits ~10–20 mm below the surface, then apply the correct jointing product.

Damage to Edge Shoulders - How to Repair
If the concrete edges (shoulders) of the expansion joint are damaged, repair them properly before filling:
- If the damage is moderate, you can use a joint‑filling product (such as the Jointex range) which fills the hole and edges in one step. However, be aware these are not designed for feather‑edging (i.e., going from full depth to zero thickness) — the thin edge is the weak point.
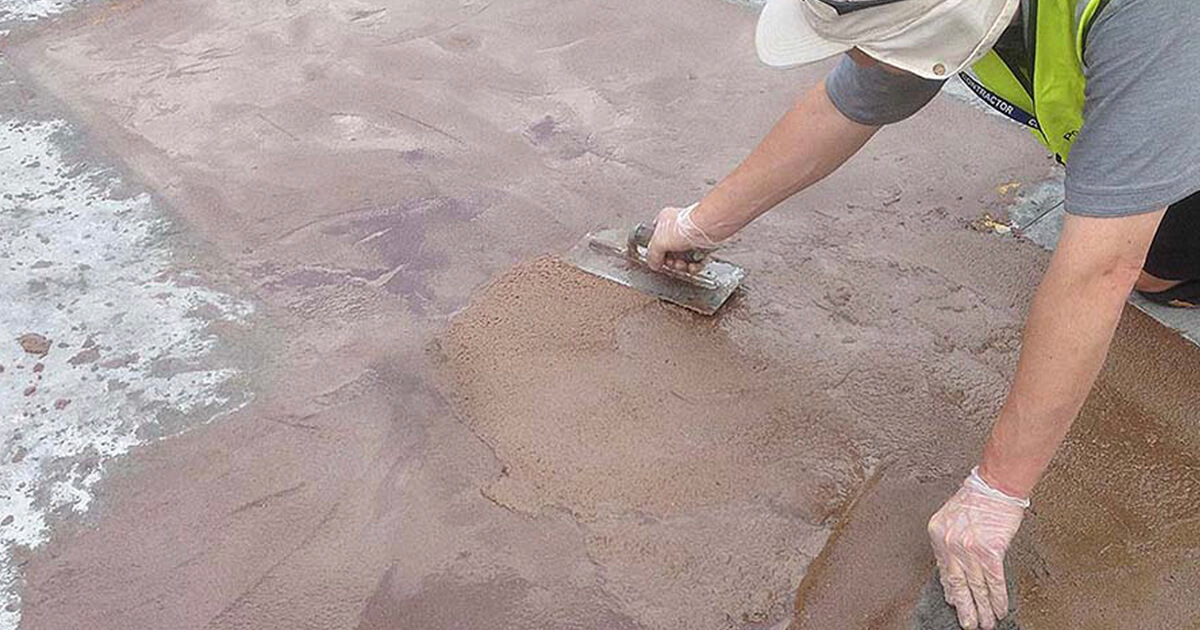
- For more severe edge damage, first repair the concrete shoulder using a strong, durable epoxy repair product (e.g., Cretex EP or Cretex EP Mortar) before applying the flexible joint filler. This ensures the edge has full strength, preventing further failure under load.
If the concrete edges (shoulders) of the expansion joint are damaged, repair them properly before filling:
- If the damage is moderate, you can use a joint‑filling product (such as the Jointex range) which fills the hole and edges in one step. However, be aware these are not designed for feather‑edging (i.e., going from full depth to zero thickness) — the thin edge is the weak point.
- For more severe edge damage, first repair the concrete shoulder using a strong, durable epoxy repair product (e.g., Cretex EP or Cretex EP Mortar) before applying the flexible joint filler. This ensures the edge has full strength, preventing further failure under load.
Professional Approach for Badly Filled Joints or Fully Damaged Edges
For joints that were previously filled with hard epoxy or other solid materials (and so no longer allow movement), follow this process:
- Clean out the joint and remove all loose or failing material.
- Repair the damaged shoulders with a heavy‑duty epoxy repair like Cretex EP or Cretex EP Mortar. Fill the joint entirely, then allow it to cure (typically 18‑24 hours).
- Using an angle grinder or diamond saw, cut along the centreline of the original joint (a chalk line helps ensure straightness).
- Fill the cut joint with a professional flexible jointing compound (such as the Jointex range) which allows effective expansion and contraction, while ensuring the shoulders remain solid and load is transferred properly.
Available Jointing Product Options
Here are some of the product choices and their characteristics:
- Jointex EP: Twin pack epoxy – strong and resistant.
- Jointex PU: Twin pack polyurethane – offers greater flexibility and chemical resistance.
- Jointex XFH: Flexible, strong, fast cure (ready for traffic in < 2 hours).
- Jointex CSG: Highly cold‑tolerant (usable down to ‑30 °C) and ready for traffic in less than 2 hours.
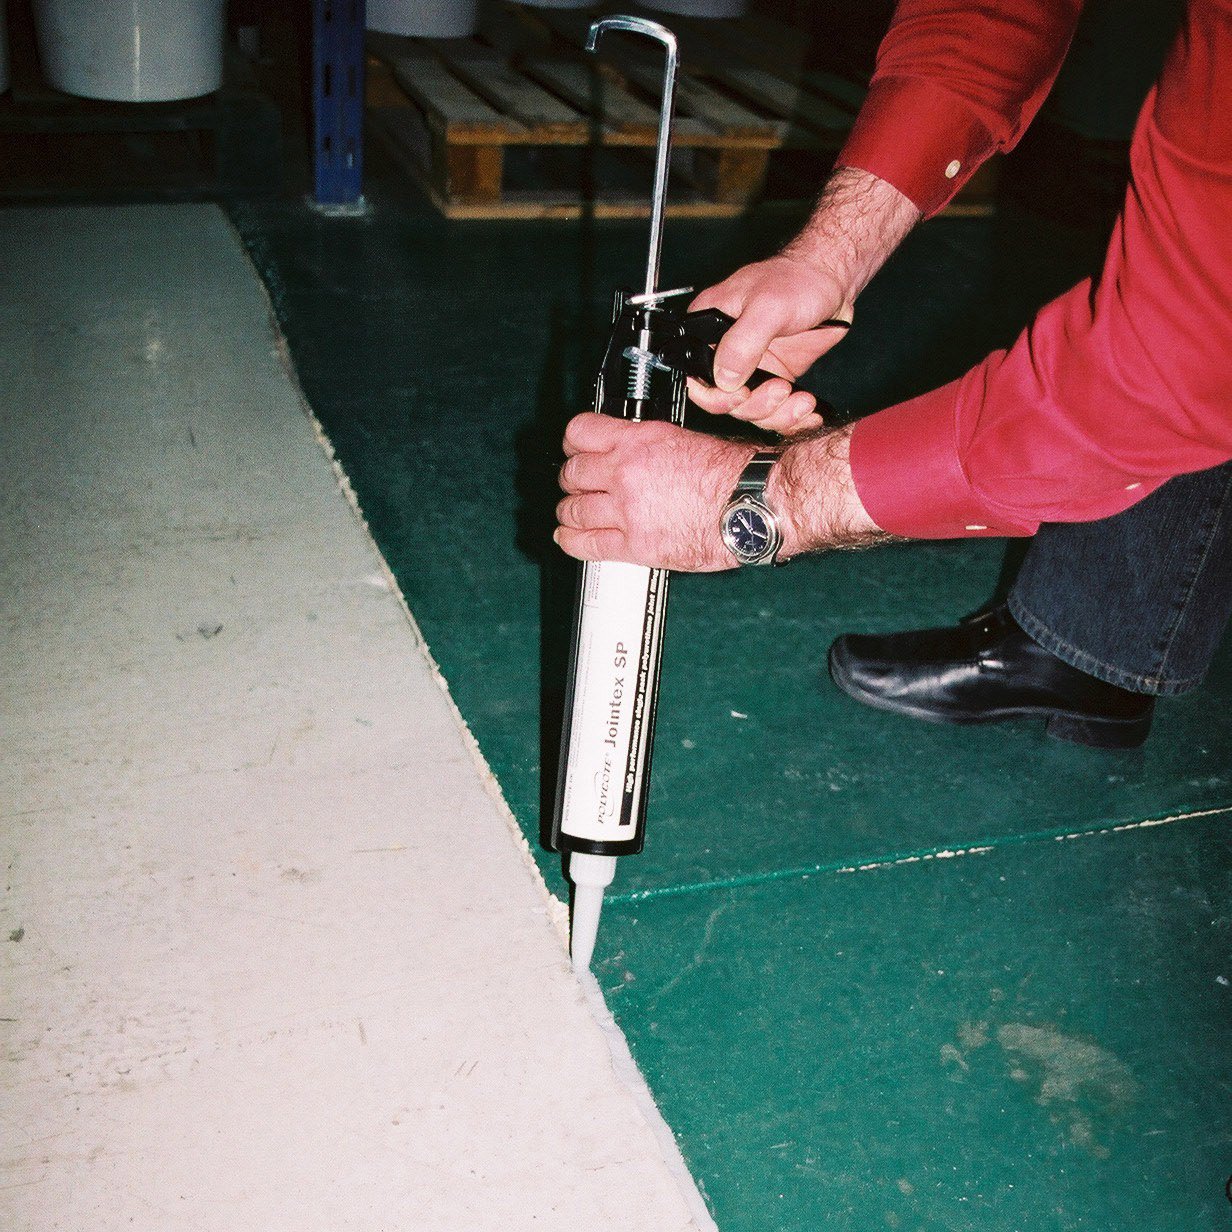
- Jointex SP: Cartridge/tube product — no mixing required; simple, direct application.
Here are some of the product choices and their characteristics:
- Jointex EP: Twin pack epoxy – strong and resistant.
- Jointex PU: Twin pack polyurethane – offers greater flexibility and chemical resistance.
- Jointex XFH: Flexible, strong, fast cure (ready for traffic in < 2 hours).
- Jointex CSG: Highly cold‑tolerant (usable down to ‑30 °C) and ready for traffic in less than 2 hours.
- Jointex SP: Cartridge/tube product — no mixing required; simple, direct application.
Need Further Help?
If you’re still unsure which product or approach is best for your site, you can contact the technical team on 01234 846 780 or uksales@polycote.com for practical advice.

Article contributors