Why Concrete Surface Preparation Is Important
Part I – General Information
Concrete is made up of three materials: cement (10 to 15% of the total volume), and aggregates (65 to 80%) and water, this making up the remaining volume. As the water and cement are mixed together, the chemical reaction between the two causes the mass to hydrate and harden. The aggregates are then bound together by the hydrating cement thus giving the cured mass its basic strength. Both fine and course aggregates can be used, depending upon the viscosity and/or strength ultimately required.
A fourth material – Polycote Bondex, (a highly advanced Styrene Butadiene Co-Polymer) can be added for a variety of specific purposes such as entrapment of air, the acceleration of the setting and increase of the overall hardness.
The minimum amount of water required to place the concrete should be used – since excess water greatly weakens concrete. Standard concrete is generally around 20N/mm, whilst a better quality of concrete is normally in the region of 30-35N/mm. However, floors subjected to heavy usage in industrial applications normally being in excess of 40N/mm.
Part 2 – New Concrete Conditions
Laitance
The surface of new concrete is always weak, even on good high strength concrete, because troweling methods and the curing process encourage lighter components such as surplus Portland cement and water to rise to the surface. When this cement rich scum sets, it is called “laitance.” Laitance is present to a depth of approximately 1/16-inch and is very weak and brittle. Unless the laitance layer is removed, stresses put on the laitance layer during use of the floor will very likely cause disintegration of the laitance and disbandment of any applied coating.
Curing Compounds
These materials are often sprayed onto wet concrete to act as membranes, which retard water evaporation while the concrete is curing. Curing compounds reduce rapid volume change in the concrete, thus reducing shrinkage.
Sprayed-on curing compounds are wax or resin based materials, which leave an almost invisible film on the surface of the cured concrete and will prevent the proper adhesion of coatings to the concrete substrate. If possible, prohibit the use of curing compounds on new concrete floor slabs. If curing compounds are used, they must be removed before any subsequent surface preparation takes place and any coatings are applied. A test method to determine their presence will be given later.
Hardeners
Solutions of various chemicals are frequently applied to new concrete floor slabs to reduce dusting (the breaking away of non-reacted Portland cement particles). These chemicals react with the concrete, producing a slick, hard, dense surface, which cannot be directly coated. This reaction often hardens the concrete to a depth of 1/4 inch or more. It is difficult to visually detect the presence of
most hardeners. A test method for their detection will be described later.
Fluorosilicates can be removed effectively by double etching (see below). Sodium silicates as well as zinc sulfates and sodium sulfates produce a surface layer which acid or chemicals will not remove. The only effective means of removing them is by scarification or by thorough blast cleaning.
Do not attempt to coat a floor treated with these hardeners without first removing them by mechanical abrasion.
Dry shake hardeners (metallic or non-metallic) are shaken onto fresh wet concrete behind the first power floating operation, creating denser, stronger, non-dusting slabs. It is necessary to etch floors treated with these materials. Mechanical abrasion is not normally required.
Concrete Curing Time
New concrete contains much water, some of which is surplus. Before any coating system is applied, the wet concrete must be permitted to cure (age) for as long as possible in order to reduce the moisture content and to permit the major part of the floor slab shrinkage to take place. The initial water content and thickness of the slab, the preparation of the underlying surface, the prevailing climatic conditions (relative humidity, air temperature, substrate temperature) and the presence or absence of accelerating or retarding additives in the concrete all have a great effect on the curing time required prior to coating.
For concrete not subject to freeze-thaw cycling, 30 days is generally considered the minimum curing time prior to painting. This 30-day period assumes an average drying temperature of 20°C. In the winter and early spring, (and in an unheated, closed industrial building), a typical 150mm (6”) slab should be allowed to cure for 60 days.
Accelerators
Special ingredients (Accelerators) can be added to concrete to speed up the cure rate. When incorporated into the mix, the initial cure time may be reduced by a third depending upon the specific accelerator used. Accelerators reduce the water/cement ratio, improve workability, and can aid in cold weather concreting schedules.
Moisture Content
Properly mixed concrete contains water in excess of that required to hydrate the cement. This excess water is maintained during the first thirty days or so by means of fine sprays, burlap-covers, plastic sheets and curing agents. After this time, the concrete is exposed to ventilating air and the excess moisture allowed to evaporate. Most architectural coatings are breathers and may be applied during this evaporation period without damage to the paint system.
It should be noted that almost all high performance and high build coatings, and twin pack epoxy and polyurethane coatings in particular, are vapour barriers and will not permit passage of moisture, either liquid or vapour. Moisture content must therefore be down to a level acceptable to the coating manufacturer before application of the seal coat. Moisture Meters are available for concrete and are effective in the hands of an expert inspector. We do indeed have coatings that are suitable for ‘green’ concrete, but it is extremely important that you discuss your situation clearly with one of our technical advisors.
Form Release Agents For Concrete
Function – A form release agent must perform several functions:
- Permits a clean release of the form from the hardened concrete.
- Leave a surface that is as hard and durable as the concrete itself.
- Provide protection for the form material so it may be reused.
- Allow satisfactory binding of protective and decorative finishes.
Types – Most form release agents are one of the following types:
- Straight petroleum oils – effective but excess amounts will cause paint failure.
- Waxes – effective but can cause paint failure.
- Oil emulsions – may cause discolouration.
- Lacquer, shellac and resin coatings – these are usually clear, varnish type coatings that seal the form which may be reused.
- Resins in solvent – widely used for lift-slab and tilt-up operations. They produce very little staining when used according to directions.
- Chemically active coatings – combine with calcium and aluminium hydroxide to form a soap which then releases concrete from form.
- Lacquer, shellac and resin coatings – these are usually clear, varnish type coatings that seal the form which may be reused.
Painting Over Release Agents
Form release agents may cause adhesion problems either when the wrong agent is used or when an agent designed for accepting paint is used in excess. The severity of the problem depends to a great extent on the type, strength and thickness of the coating to be applied.
Coatings formulated from epoxy and polyurethane resins (no matter how strong or ‘high build’ they are), may fail if the system is not anchored into the pores of the concrete, irrespective of form release agents. Therefore, it is extremely important that these release agents are removed and the surface pores opened, in order to allow the first coat to penetrate.
However, it may be of interest to note that Latex masonry paints are designed to have good adhesion over (properly used) form release agents. They have film builds usually under 4 mils per system. The film has greater adhesion than cohesion so minor film damage does not spread.
Part 3 – Laying/Finishing Of New Concrete
Poured/Tamped Concrete
The freshly mixed concrete is carried to the site by lorry and poured into previously placed forms. Vibrators are often used to remove as much air as possible and to assist the flow of wet concrete into all areas and corners of the structure. The wet concrete is the tamped / screeded to a level finish by hand.
Powerfloating
Prior to the introduction of power tools, a floated finish was that produced by a large, generally wooden or sometimes metal, hand float moved over the surface when the concrete was still plastic. This produced a flattish slightly textured surface which often contained float marks. Nowadays, the operation is carried out using powered machines fitted with either a large circular pan or large flat metal floats. Power floating is generally carried out later than hand floating as the concrete needs to take the weight of the machine. A simple test is when the heal of a boot leaves only a slight impression, say 3mm. Power-floating produces a similar surface to hand floating, with a slightly textured surface often with circular swirl marks from the floating operation. This operation is sometimes called panning. Too many passes can cause a ´burnished´ appearance.
Hand Trowelling
Depending upon the skill of the layer, trowelling the concrete by hand can achieve a very smooth finish, similar to that produced by the power float. However, it usually exhibits slight ridges between each pass of the float where the concrete has slight depressions along the line of the top reinforcement. Care is needed in the timing of the finishing of the concrete surface. If the trowelling of the surface is undertaken too early, excess water may be worked into the surface thereby weakening it and giving a risk of rapid surface wear. Concrete worked in such a way can end up with little or no aggregate near the surface, leaving only very fine dust which in turn is called “laitance” and is not strong enough to take hard impact.
When carried out correctly on concrete of the appropriate class, steel trowelling leaves a smooth, very dense surface and is often used for the installation of industrial flooring in warehouse and similar large slab areas.
Exposed Aggregate Panels
The special aggregate is spread in a thin layer on the bottom of the form and the wet concrete poured over it. After the concrete has cured, the panel is lifted and the still green, retarded mortar washed from over and around the aggregate particles.
Part 4 – Old/Existing Concrete
In addition to the conditions mentioned above for new concrete, concrete that has been in service (if even for only a few days!) may be contaminated with oils, grease or chemicals. The presence of any contaminants or coatings must be determined, and appropriate surface preparation performed.
Furthermore, the surface may well have been previously coated with anything from high build epoxies down to single pack paints and sealers. Deterioration of the concrete may have occurred due to the environment. The soundness of the floor must be evaluated. The feasibility of coating the floor and/or the appropriate preparation will depend upon this evaluation.
Previously Painted Surfaces
It is extremely important to ensure the existing surface is completely sound and never more so than when painting over an existing floor coating.
Too many people would like to simply re-coat the floor with little to no preparation. However, should the existing coating be peeling, flaking or bubbling, it must be realised that to simply coat over a product that has not fully adhered to the substrate is nothing more than a complete waste of time, effort and money! Remove all loose coatings with Hand Scrapers, Vacuum Assisted Diamond Grinders and/or Vacuum Assisted Shotblasters.
Dirty, Oily, Contaminated Concrete
One of the most common problems facing the floor painter is the cleaning of dirty/contaminated concrete. it is important to realise concrete is like a sponge – it is full of air holes. Pour a bucket of water onto any unsealed concrete floor and you will watch almost the entire amount simply disappear. Being water, this will simply rise and evaporate over the following few days until the concrete reverts to a completely dry state. However, when oil or some other form of contamination has penetrated the concrete, this will never ‘evaporate’. Furthermore, it must be realised that a chemical clean will only wash the top surface. Due to the fact that the oil has penetrated into the concrete, as the surface is cleaned, the oil remaining within the slab will simply rise to the freshly cleaned surface and for the floor only to appear as dirty ‘now’ as it was immediately prior to cleaning!
It is advised to degrease the surface and then to check the soundness of the surface structure. Should the concrete have been damaged or weakened by such contamination, mechanical removal of the damaged surface is paramount.
A similar cleaning procedure or just steam cleaning with hot detergent will clean tight, old coatings. All loose and peeling paint must be removed prior to the application of any further coating.
Filling, Patching & Smoothing Concrete
The surface of poured or pre-cast concrete may contain holes caused by water or air pockets. Cracks, form patterns and other imperfections may be present. If the surface needs to be made smooth and even prior to application of the coating system, some type of surfacing material must be applied by trowel, brush or squeegee.
Polycote has many products to fill holes and cracks, expansion joints. View our range of floor repair products here.
Part 5 – Initial Inspection/Testing Procedures and Analysis
The first step in evaluating surface preparation requirements is to make a visual inspection to determine the condition of the concrete surface. It is important to know the history of the existing concrete. This should include not only the chemicals to which it has been exposed (if old concrete) but also construction details such as; was the concrete placed directly on soil or clay or is there a sand or gravel drainage bed? Is there a vapor barrier? How far under the floor is the water table?
The concrete should be inspected for porosity, exposed aggregate, cracks, laitance, evidence of surface hardeners or the presence of a curing compound membrane. Any evidence of moisture or damp or wet spots on the floor should also be noted.
Testing for Surface Soundness
Determine the soundness of the surface by scratching it with a screwdriver, file or pocketknife.
The metal object should ride over the surface without loosening any particles, leaving no more than a shiny mark. If this process leaves a gouge, the surface is not sound and will not support polyurethane or epoxy high-performance coating system.
Another method used to test for soundness is to strike the surface with the edge of a hammerhead. If the hammer rebounds sharply leaving no more than a small fracture, the surface is sound. If it lands with a dull thud and leaves powder in the indentation, the surface is not considered sound or paintable. An unsound surface may be caused by the presence of laitance, degradation of the concrete due to chemical attack, an improper concrete mix, improper cure, or other factors.
Testing For Moisture
Inspect the concrete for moisture by first looking for damp or wet spots on the floor. Note any leakage from other areas which must be eliminated prior to the application of the coating system. Check for hidden dampness. As described in ASTM Method D 4263, this test is preferred to the use of a moisture meter, which may give inconclusive results. However, by taping a 1m x 1m sheet of thick polythene to the floor at various locations where moisture conditions may vary, such as near exterior walls, near the center of the building, or indeed, any particular suspect area, this can quickly prove the presence of damp conditions.
Make sure the sheet is completely sealed to the floor. Check the sheet after 16-24 hours. If beads of water show on the underside of the sheet, there is sufficient water vapor present to interfere with the adhesion of a coating system.
Testing For Suitable Cleaning Method
Before deciding on any particular method, clean several relatively small areas to assess the efficiency of the method and the appearance and condition of the surface after cleaning. The reasons for cleaning must be considered carefully because results with methods intended to improve only the appearance of the surface can differ substantially from results obtained with methods intended to prepare the surface for a heavy-duty urethane or epoxy coating.
The floor surface should be tested in a number of places to ensure that the entire area to be coated does not contain oil or grease contamination. Areas around machinery, pumps and equipment subject to heavy spillage of oils and other contaminants should be closely inspected and tested. Grease and oil can be effectively removed using Polycote Degrease IT.
The following procedures can be used to determine a suitable chemical preparation method. CAUTION: Wear protective clothing, gloves and goggles and, if necessary, respiratory protection when performing these tests. When diluting acid with water, always add acid to water.
Treat several small areas (approx. 1sq.m) with Polycote Etch IT. A mixture of 1 part Etch IT to 3 parts water is recommended for testing. If the solution bubbles vigorously producing a uniform white foam or haze of bubbles and leaves a clean surface, there is no curing membrane or hardener.
Should a single etch result in the surface being appreciably rougher than fine sandpaper, repeat the test with a more dilute acid solution until an etched profile similar to fine sandpaper is obtained.
However, if the opposite happen whereby only a weak or partial reaction occurs, beware of the fact that a curing agent or surface hardener is present. In many cases, more than one etch is required. A poor result and/or failure of the above tests indicates the presence of a hardener, which cannot be removed chemically. Remove concrete to a depth of at least 1-3mm, preferably with the use of a heavy diamond grinder or scabbler.
For the removal of existing paints and epoxy coatings, most companies will favour mechanical removal. However, if the job is only small and/or the conditions not allow such methods, then chemical preparation will be required. For the removal of standard single pack paints and linemarking, use Polycote Graffiti Remover Liquid.
Scrub a small area with non-woven abrasive and the chosen stripper. Remove paint and rinse thoroughly with a cleaner to neutralize. Once completed, continue with the Polycote Etch IT as above.
Part 6 – Surface Preparation Methods
The importance, type and degree of preparation required before painting depends on the type and condition of concrete, the exposure, and the coating system to be applied. The concrete should be clean, dry and free of dust, dirt, oil, surface matter and form release build-up.
IMPORTANT NOTE: When using any of the equipment or chemical solutions described below, be sure to follow all manufacturer’s instructions and follow any recommended safety procedures.
Broom/Vacuum Cleaning
The obvious and most basic method of preparation in order to remove all surface dust, dirt and any other loose/friable material.
Chemical Cleaning
As an alternative to mechanical methods, the preparation of concrete floors for coatings application can be accomplished by using chemical cleaning methods. Capitalized solvents or solutions as mentioned below are available.
Acid Etching
Etching is a very low cost chemical method commonly used to treat concrete floors to remove laitance and provide a profile. The objective of acid etching Polycote Etch IT is to dissolve the weak surface layer known as laitance and open the pores to allow penetration of the sealer coat. Polycote Etch It is a concentrated Hydrochloric Acid and should be diluted with water. The volume dilution ratio can range from 1 part acid to 3 parts water to as weak as 1 part acid to 10 parts water depending upon the floor being treated.
The surface is pre-dampened and the diluted acid applied uniformly over an appropriate area. The approximate spreading rate is normally around 10sq.m per litre of acid mixture. The acid should remain on the surface for two to three minutes of bubbling reaction. After application of the acid, scrub the surface with a stiff bristle pavement, scrubbing broom or rotary power scrubber will facilitate the etching process. The vigorous formation of bubbles indicates proper etching and must be obtained. The absence of bubbles or a weak reaction indicates the presence of a curing compound membrane or a surface hardener on the concrete.
Once etching is completed, thorough rinsing with fresh water must be done before the surface dries – in order to avoid the formation of salts on the surface. Once formed, these salts are difficult to remove. Any residual acidity must be neutralized with an alkaline cleaner followed by thorough rinsing with fresh water.
A properly etched concrete surface will be hard but porous and will have a profile similar to that of fine sandpaper. Water will penetrate easily and will hot bead up on the surface. In many cases, more than one etching operation is required to obtain a satisfactory result. The etching solution should never be more concentrated than 1 part acid to 3 parts water. If satisfactory results are not obtained with this concentration, repeat the etching procedure. If the surface is rougher than fine sandpaper after one etching, more dilute acid solutions (dilution up to 1 part acid to 10 parts water) should be used. In addition to muriatic acid, proprietary etchants, which contain phosphoric acid and concentrated cleaners, are available and may also be used.
As an alternative to etching with hydrochloric acid, the use of phosphoric acid (which is non-volatile) should be considered in sensitive situations.
Please note that Acid Etching will not be effective over release agents, most curing membranes, or most surface hardeners. Should you wish to remove greases, oils, or other types of contaminants, these can be treated with Polycote Degrease IT prior to etching procedure.
IMPORTANT SAFETY INFORMATION: Please further note, that both hydrochloric and phosphoric acids cause burns to skin and eyes, and the inhalation of acid fumes may be harmful.
Solvent Cleaning
Emulsifiable solvents such as Membrane Remover and the cleaner are a balance of detergents, solvents and emulsifiers. They are soluble in water. They are powerful cleaners, which very effectively cut through and remove rubber burns, grease, oil and stubborn soilage and hold these contaminants in suspension for easy pick up with a wet vacuum or other disposal method. The Membrane Remover may also be used to remove many types of curing membranes. Thorough rinsing with fresh water must follow the use of these solvents. If the Membrane Remover is used, rinsing with the Cleaner must precede the final water rinse.
Degreasing
The removal of any grease, oils and fats from floor and wall surfaces is imperative, prior to applying paint or other coatings. Polycote Degrease IT is a powerful multi-purpose cleaner and degreaser, containing phosphate, alkali builders and solvents in a highly alkaline detergent composite.
Normally diluted with water at a ratio between 1:4 for floors and 1:40 for machinery, Degrease IT may also be used undiluted for removing severe grease contamination. Spray or pour and brush the chemical onto the surface to be cleaned and allow to penetrate for at least 5 minutes. The surface should then be thoroughly scrubbed to lift the grease or oil from the surface. Once done, this should then be thoroughly rinsed away. An Aquavac is an excellent way of removing the waste. Better still, is the use of a Scrubber Drier which will not only lift the contamination from the surface due to the heavy scrubbing motion but will also suck of the resultant liquid into a built in waste tank leaving not only a well cleaned surface but also one that is pretty much dry.
As mentioned previously, it is important to realise concrete is like a sponge – it is full of air holes. Pour a bucket of water onto any unsealed concrete floor and you will watch almost the entire amount simply disappear. Being water, this will simply rise and evaporate over the following few days until the concrete reverts to a completely dry state. However, when oil or some other form of contamination has penetrated the concrete, this will never ‘evaporate’. Furthermore, it must be realised that a chemical clean will only wash the top surface. Due to the fact that the oil has penetrated into the concrete, as the surface is cleaned, the oil remaining within the slab will simply rise to the freshly cleaned surface and for the floor only to appear as dirty ‘now’ as it was immediately prior to cleaning! Should you wish to coat the floor, then this procedure should be completed as soon as possible after the completion of the cleaning. Polycote OT Primer is the best option for this as it can bind up to 15% oil into itself and its unique ability to adhere to previously contaminated floors is almost unparalleled.
Hand Tool Cleaning
Sanding and wire brushing is commonly used to remove loose matter from the surface and to a lesser extent to open voids and holes before coating. Furthermore, both power and hand wire brushing is also used to abrade the existing surface to provide a ‘key’ for any subsequent coating.
Mechanical Cleaning
The preparation of concrete using certain mechanical methods has the advantage of speed. If the more rigorous methods such as blasting or scarifying are attempted by insufficiently trained operators, however, removal of too much of the surface can easily result in exposed aggregate and an overly rough and porous surface. It must be realized that improperly performed mechanical preparation can severely damage a concrete floor.
Power grinding, sanding or scraping can be used to open holes and voids and to remove curing membranes, some hardeners, loose matter and laitance from the surface of floor slabs. These methods can be used in place of blasting but are considerably slower and less effective.
Shotblasting
This method of industrial floor preparation is widely regarded as the most professional and most effective surface preparation method for concrete is a light blast with a Vacuum Assisted Shotblaster. The objective is the same as acid etching. The blast removes all form release agents, weak concrete, laitance, dirt and contamination. Being connected to one of our highly powerful industrial vacuums assures that at least 95% of the dust is contained.
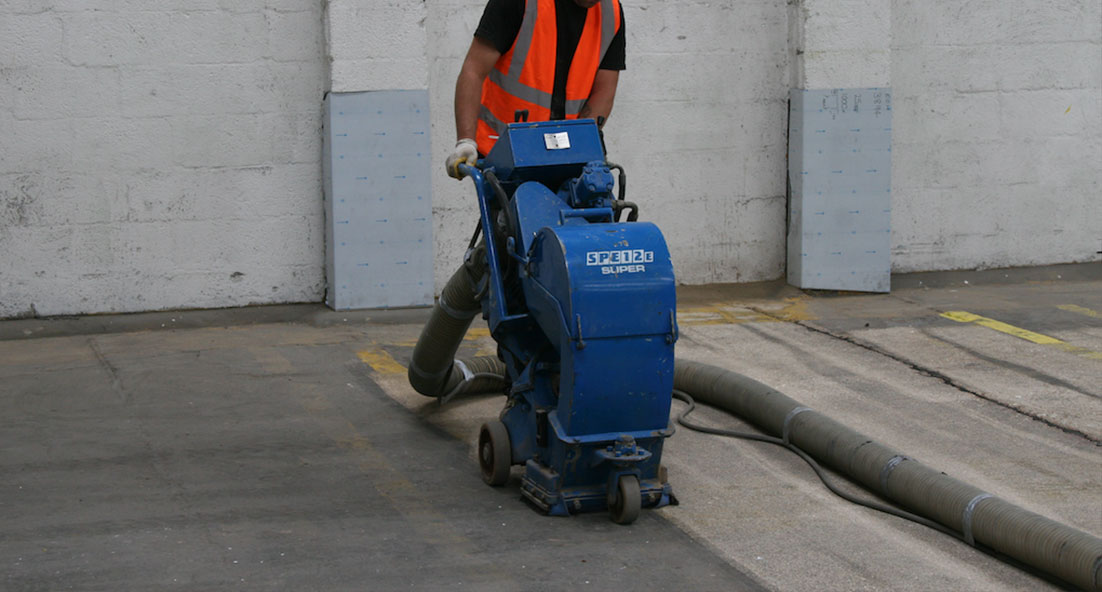
Scarifying/Scabbling
When inspection and testing procedures indicate concrete floors must be chipped down to sound concrete Scarifiers and Scabblers may be used to remove the top layer of concrete to expose a fresh, clean surface. This technique is practical only for floors. Important; dust protection is required when used in the presence of machinery, food or close traffic. We have a full team of qualified operatives ready to complete this work as necessary. However, the equipment can be either purchased or rented should you wish to complete the work yourselves. Please be free to ask.
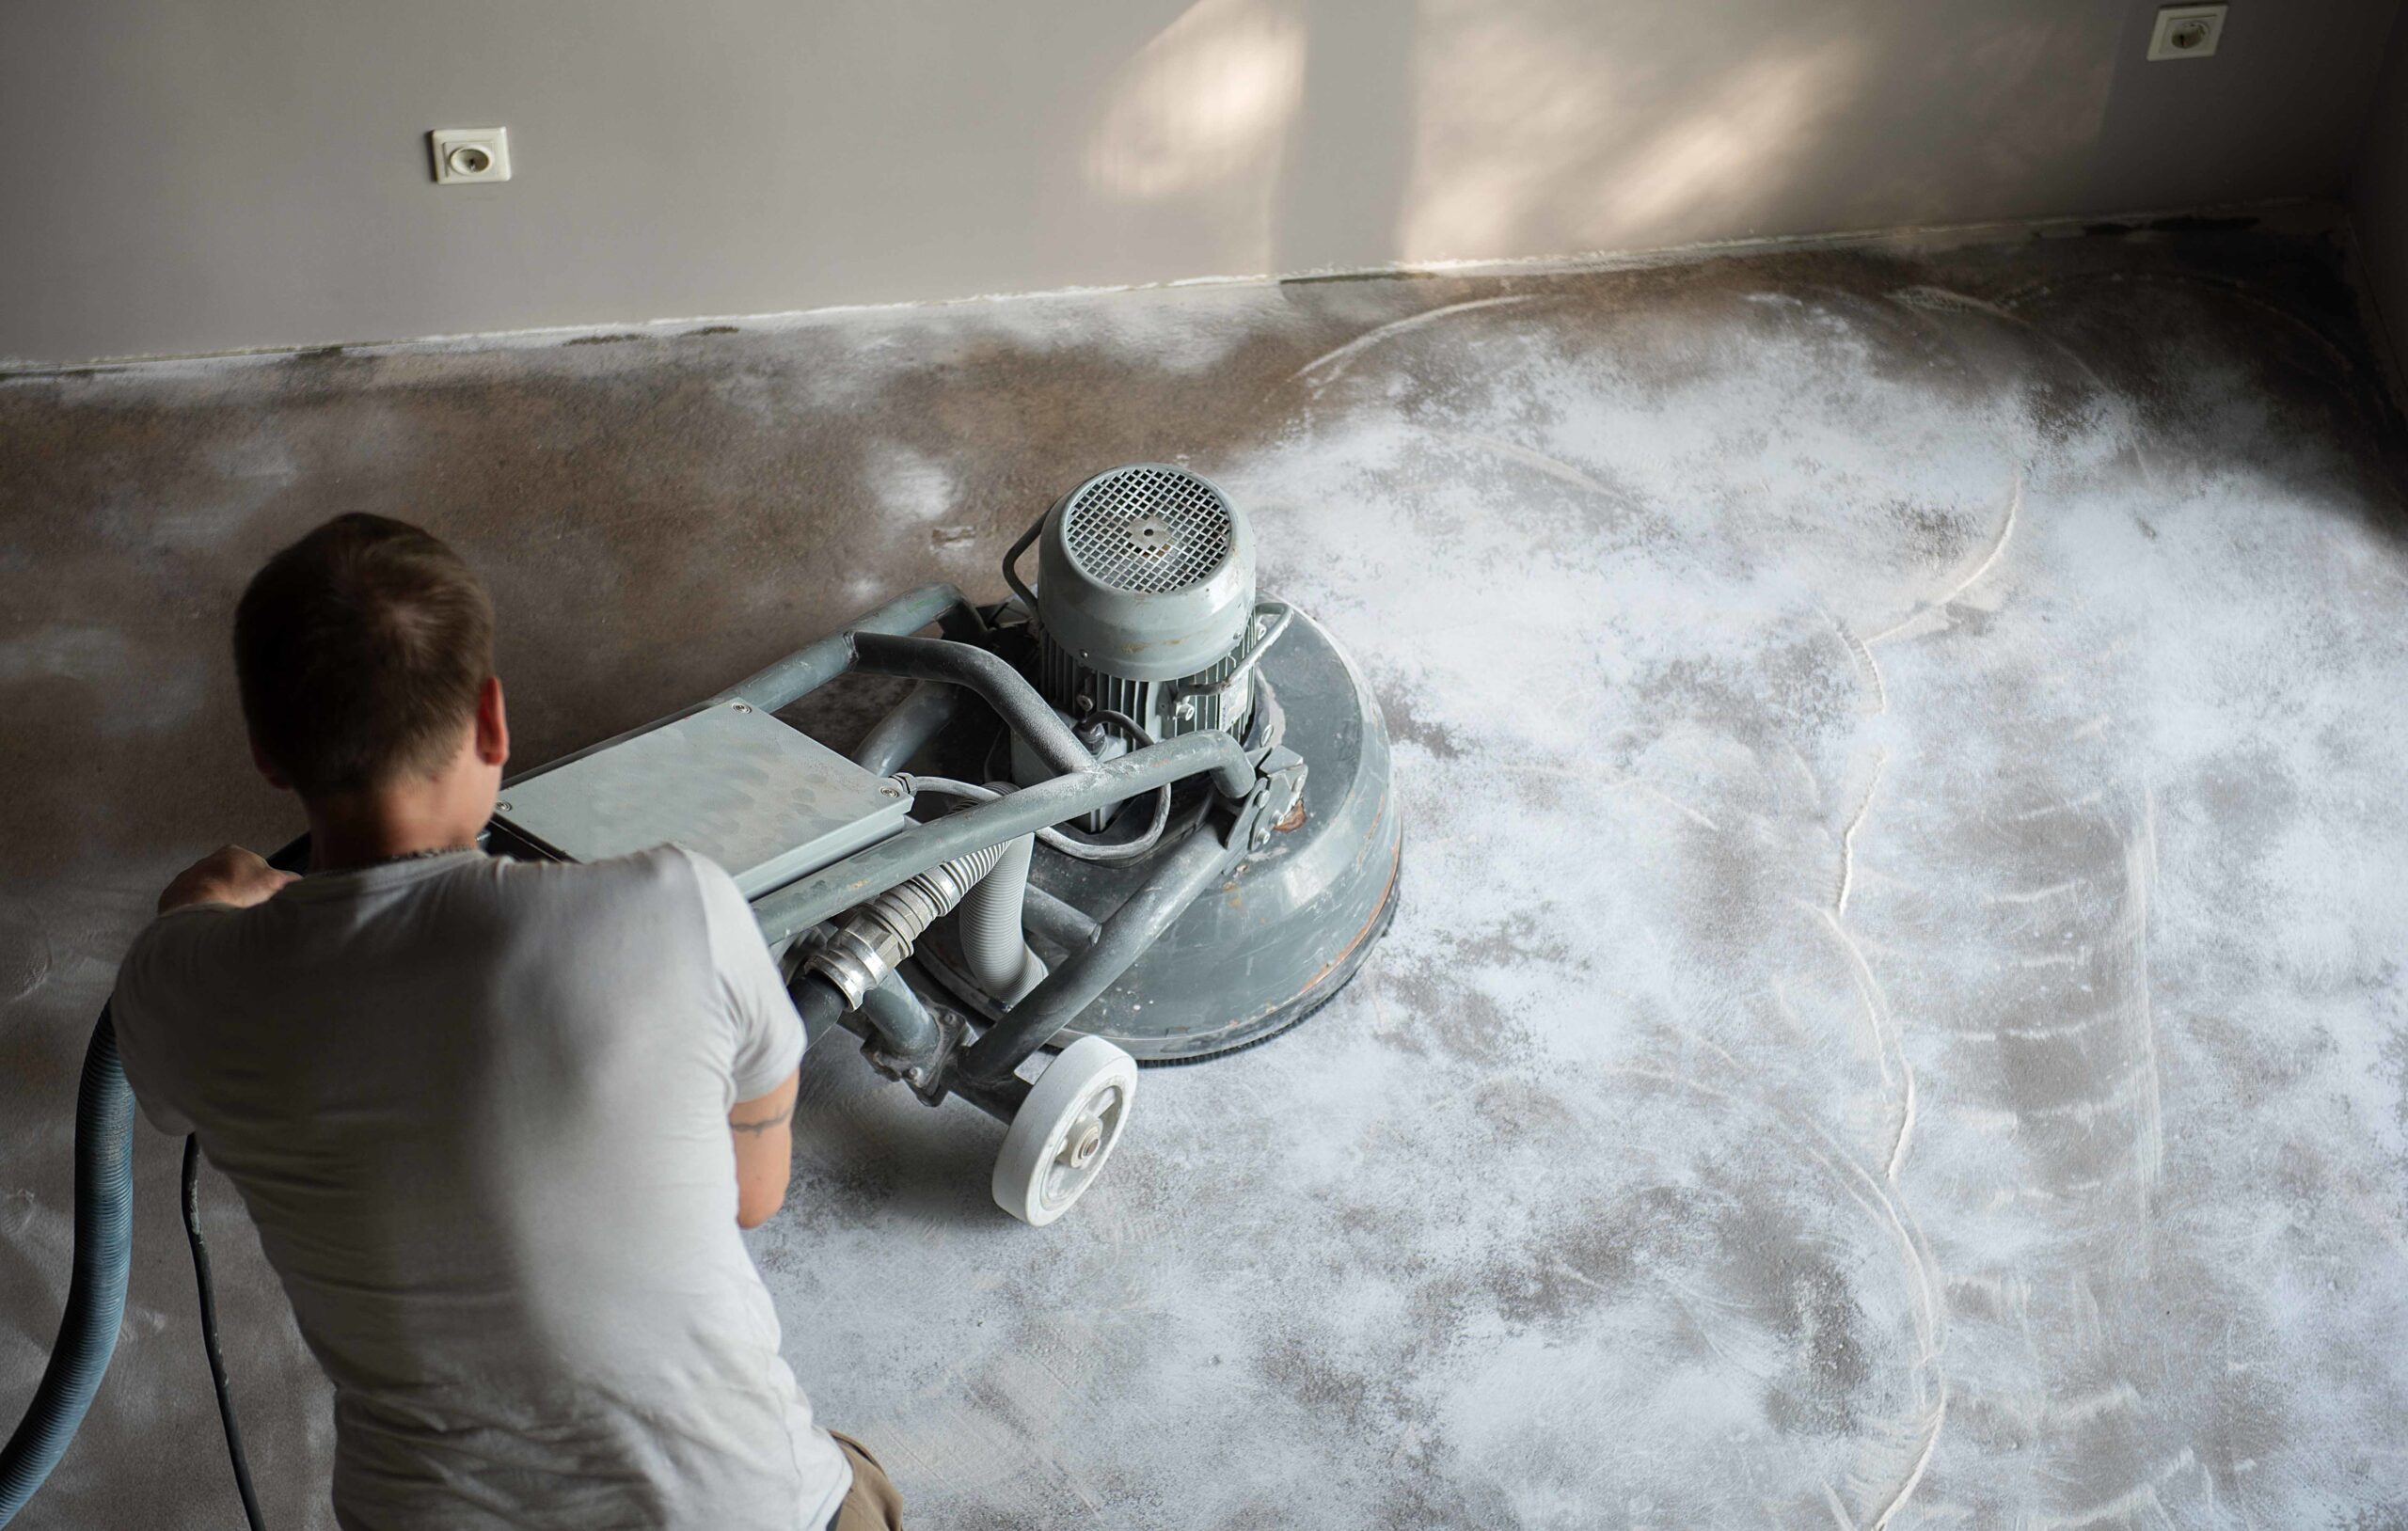
Hand Held/High Speed Diamond Grinders
Far more than just a ‘sander’, our Diamond Grinders are powerful enough for almost any demanding industrial requirement. They are used for many and varied applications, from the ‘keying’ of existing surfaces, removal of existing paints and weak laitance, to the smoothing out of uneven surfaces, we have a grinder that will be ideal for your application. On the contrary, we are often asked for the complete whereby we are asked to actually roughen the surface to achieve higher levels of slip resistance.
Diamond grinding can smooth out floors to a laser level finish, removing minor pits and divots, high spots and roughness on concrete floors. Should two slabs of concrete be poorly laid to different height, the grinder is used to smooth out the transition from one slab to the other. A huge benefit of the system is that all machines, ranging from simple hand held grinders to the biggest ride-on machines can all be connected to industrial dust recovery units. This in turn means that we can achieve a 95% dust free operation.
With grinders that have pressure controlled rubber mounted non-planetary grinding heads and specially designed diamonds, you are able to grind and/or polish without scouring the concrete, even on cracks and expansion joints. The specialist disc, embedded with a coarse diamond grit can easily prepare, clean and abrade existing coatings for re-coat. This process will remove thin layer coatings and weak toppings and provide a textured finish suitable for two coatings to bond together. Should an existing coating be already down that is fundamentally adhering very well to the surface but one that simply needs rejuvenating, the keying of this existing surface in order to accept a further coat can also be easily achieved.
In comparison to shotblasting, diamond grinding is relatively is slow and intensive. However, the finish left can be far smoother. In some cases, we are asked to actually polish the surface to a super smooth finish.
Please do note however that in the wrong hands, diamond grinders can leave swirl marks in the slab should the operative be untrained or overly aggressive.
The importance, type and degree of preparation required before painting depends on the type and condition of concrete, the exposure, and the coating system to be applied. The concrete should be clean, dry and free of dust, dirt, oil, surface matter and form release build-up.
IMPORTANT NOTE: When using any of the equipment or chemical solutions described below, be sure to follow all manufacturer’s instructions and follow any recommended safety procedures.
Broom/Vacuum Cleaning
The obvious and most basic method of preparation in order to remove all surface dust, dirt and any other loose/friable material.
Chemical Cleaning
As an alternative to mechanical methods, the preparation of concrete floors for coatings application can be accomplished by using chemical cleaning methods. Capitalized solvents or solutions as mentioned below are available.
Acid Etching
Etching is a very low cost chemical method commonly used to treat concrete floors to remove laitance and provide a profile. The objective of acid etching Polycote Etch IT is to dissolve the weak surface layer known as laitance and open the pores to allow penetration of the sealer coat. Polycote Etch It is a concentrated Hydrochloric Acid and should be diluted with water. The volume dilution ratio can range from 1 part acid to 3 parts water to as weak as 1 part acid to 10 parts water depending upon the floor being treated.
The surface is pre-dampened and the diluted acid applied uniformly over an appropriate area. The approximate spreading rate is normally around 10sq.m per litre of acid mixture. The acid should remain on the surface for two to three minutes of bubbling reaction. After application of the acid, scrub the surface with a stiff bristle pavement, scrubbing broom or rotary power scrubber will facilitate the etching process. The vigorous formation of bubbles indicates proper etching and must be obtained. The absence of bubbles or a weak reaction indicates the presence of a curing compound membrane or a surface hardener on the concrete.
Once etching is completed, thorough rinsing with fresh water must be done before the surface dries – in order to avoid the formation of salts on the surface. Once formed, these salts are difficult to remove. Any residual acidity must be neutralized with an alkaline cleaner followed by thorough rinsing with fresh water.
A properly etched concrete surface will be hard but porous and will have a profile similar to that of fine sandpaper. Water will penetrate easily and will hot bead up on the surface. In many cases, more than one etching operation is required to obtain a satisfactory result. The etching solution should never be more concentrated than 1 part acid to 3 parts water. If satisfactory results are not obtained with this concentration, repeat the etching procedure. If the surface is rougher than fine sandpaper after one etching, more dilute acid solutions (dilution up to 1 part acid to 10 parts water) should be used. In addition to muriatic acid, proprietary etchants, which contain phosphoric acid and concentrated cleaners, are available and may also be used.
As an alternative to etching with hydrochloric acid, the use of phosphoric acid (which is non-volatile) should be considered in sensitive situations.
Please note that Acid Etching will not be effective over release agents, most curing membranes, or most surface hardeners. Should you wish to remove greases, oils, or other types of contaminants, these can be treated with Polycote Degrease IT prior to etching procedure.
IMPORTANT SAFETY INFORMATION: Please further note, that both hydrochloric and phosphoric acids cause burns to skin and eyes, and the inhalation of acid fumes may be harmful.
Solvent Cleaning
Emulsifiable solvents such as Membrane Remover and the cleaner are a balance of detergents, solvents and emulsifiers. They are soluble in water. They are powerful cleaners, which very effectively cut through and remove rubber burns, grease, oil and stubborn soilage and hold these contaminants in suspension for easy pick up with a wet vacuum or other disposal method. The Membrane Remover may also be used to remove many types of curing membranes. Thorough rinsing with fresh water must follow the use of these solvents. If the Membrane Remover is used, rinsing with the Cleaner must precede the final water rinse.
Degreasing
The removal of any grease, oils and fats from floor and wall surfaces is imperative, prior to applying paint or other coatings. Polycote Degrease IT is a powerful multi-purpose cleaner and degreaser, containing phosphate, alkali builders and solvents in a highly alkaline detergent composite.
Normally diluted with water at a ratio between 1:4 for floors and 1:40 for machinery, Degrease IT may also be used undiluted for removing severe grease contamination. Spray or pour and brush the chemical onto the surface to be cleaned and allow to penetrate for at least 5 minutes. The surface should then be thoroughly scrubbed to lift the grease or oil from the surface. Once done, this should then be thoroughly rinsed away. An Aquavac is an excellent way of removing the waste. Better still, is the use of a Scrubber Drier which will not only lift the contamination from the surface due to the heavy scrubbing motion but will also suck of the resultant liquid into a built in waste tank leaving not only a well cleaned surface but also one that is pretty much dry.
As mentioned previously, it is important to realise concrete is like a sponge – it is full of air holes. Pour a bucket of water onto any unsealed concrete floor and you will watch almost the entire amount simply disappear. Being water, this will simply rise and evaporate over the following few days until the concrete reverts to a completely dry state. However, when oil or some other form of contamination has penetrated the concrete, this will never ‘evaporate’. Furthermore, it must be realised that a chemical clean will only wash the top surface. Due to the fact that the oil has penetrated into the concrete, as the surface is cleaned, the oil remaining within the slab will simply rise to the freshly cleaned surface and for the floor only to appear as dirty ‘now’ as it was immediately prior to cleaning! Should you wish to coat the floor, then this procedure should be completed as soon as possible after the completion of the cleaning. Polycote OT Primer is the best option for this as it can bind up to 15% oil into itself and its unique ability to adhere to previously contaminated floors is almost unparalleled.
Hand Tool Cleaning
Sanding and wire brushing is commonly used to remove loose matter from the surface and to a lesser extent to open voids and holes before coating. Furthermore, both power and hand wire brushing is also used to abrade the existing surface to provide a ‘key’ for any subsequent coating.
Mechanical Cleaning
The preparation of concrete using certain mechanical methods has the advantage of speed. If the more rigorous methods such as blasting or scarifying are attempted by insufficiently trained operators, however, removal of too much of the surface can easily result in exposed aggregate and an overly rough and porous surface. It must be realized that improperly performed mechanical preparation can severely damage a concrete floor.
Power grinding, sanding or scraping can be used to open holes and voids and to remove curing membranes, some hardeners, loose matter and laitance from the surface of floor slabs. These methods can be used in place of blasting but are considerably slower and less effective.
Shotblasting
This method of industrial floor preparation is widely regarded as the most professional and most effective surface preparation method for concrete is a light blast with a Vacuum Assisted Shotblaster. The objective is the same as acid etching. The blast removes all form release agents, weak concrete, laitance, dirt and contamination. Being connected to one of our highly powerful industrial vacuums assures that at least 95% of the dust is contained.
Scarifying/Scabbling
When inspection and testing procedures indicate concrete floors must be chipped down to sound concrete Scarifiers and Scabblers may be used to remove the top layer of concrete to expose a fresh, clean surface. This technique is practical only for floors. Important; dust protection is required when used in the presence of machinery, food or close traffic. We have a full team of qualified operatives ready to complete this work as necessary. However, the equipment can be either purchased or rented should you wish to complete the work yourselves. Please be free to ask.
Hand Held/High Speed Diamond Grinders
Far more than just a ‘sander’, our Diamond Grinders are powerful enough for almost any demanding industrial requirement. They are used for many and varied applications, from the ‘keying’ of existing surfaces, removal of existing paints and weak laitance, to the smoothing out of uneven surfaces, we have a grinder that will be ideal for your application. On the contrary, we are often asked for the complete whereby we are asked to actually roughen the surface to achieve higher levels of slip resistance.
Diamond grinding can smooth out floors to a laser level finish, removing minor pits and divots, high spots and roughness on concrete floors. Should two slabs of concrete be poorly laid to different height, the grinder is used to smooth out the transition from one slab to the other. A huge benefit of the system is that all machines, ranging from simple hand held grinders to the biggest ride-on machines can all be connected to industrial dust recovery units. This in turn means that we can achieve a 95% dust free operation.
With grinders that have pressure controlled rubber mounted non-planetary grinding heads and specially designed diamonds, you are able to grind and/or polish without scouring the concrete, even on cracks and expansion joints. The specialist disc, embedded with a coarse diamond grit can easily prepare, clean and abrade existing coatings for re-coat. This process will remove thin layer coatings and weak toppings and provide a textured finish suitable for two coatings to bond together. Should an existing coating be already down that is fundamentally adhering very well to the surface but one that simply needs rejuvenating, the keying of this existing surface in order to accept a further coat can also be easily achieved.
In comparison to shotblasting, diamond grinding is relatively is slow and intensive. However, the finish left can be far smoother. In some cases, we are asked to actually polish the surface to a super smooth finish.
Please do note however that in the wrong hands, diamond grinders can leave swirl marks in the slab should the operative be untrained or overly aggressive.
Part 7 – In Summary, the Painting of Concrete Surfaces
Painting concrete floors can be an easy and very pleasing operation. Equally, without correct preparation, it can become a difficult and painstaking job. For maximum performance of a paint or coating, the surface must be adequately prepared to effect positive and long lasting adhesion of the coating to the substrate.
The nature and degree of surface preparation required to achieve a sound floor substrate for application of a coating system depends upon the type and quality of the concrete, the presence of any surface treatments, the nature and length of exposure conditions, the type of protection desired, economics, and other considerations.
Whatever the history of the floor in question, the end result must be a sound surface, clean and free of contaminants and absorbent enough to ensure good penetration by the coating.
Finally, no matter how good the coating, its effective service life will be shortened by insufficient or ineffective surface preparation.
Need more advice on concrete preparation?
Our technical team are experts in all areas of floor preparation. Call us on 01234 846 780 or email uksales@polycote.com for advice on any project.
Article contributors